2011 (1)
2016 (1035)
2017 (752)
2018 (978)
2019 (385)
2020 (175)
2021 (235)
2022 (101)
2023 (983)
2024 (800)


Best Time to Graft Orange Trees
-
Late spring to late summer, when the bark slips easily (meaning it separates cleanly from the wood). This is essential for successful budding techniques.
Time window (depending on climate):
May to August in most subtropical and warm temperate regions.
Best Grafting Methods for Oranges
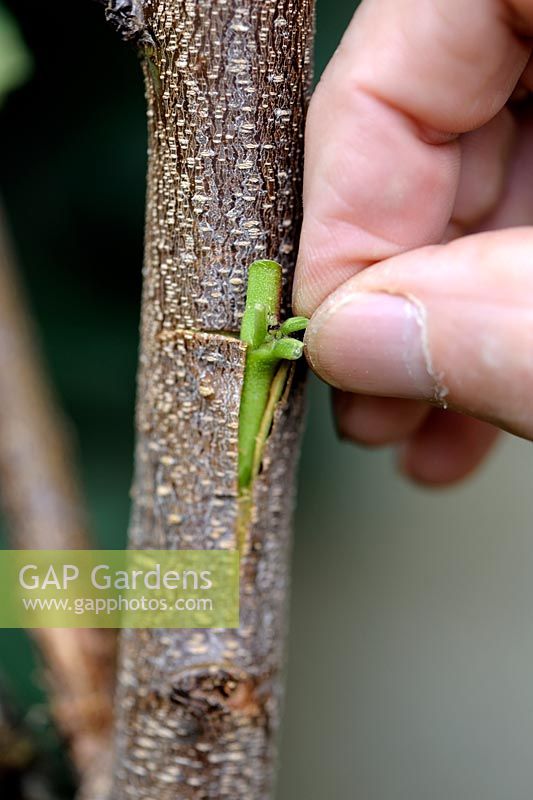
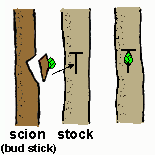
1. T-budding (Shield Budding) – Most Common
-
Done when the bark is slipping (actively growing season)
-
Insert a single bud from the desired variety under the bark of the rootstock
-
Tie with grafting tape or rubber strip
2. Chip Budding – Alternative if bark isn’t slipping
-
Useful earlier or later in the season (cooler temperatures)
-
Involves slicing a chip of budwood and inserting it into a matching cut on the rootstock
? 3. Cleft or Whip Grafting
-
Less common in oranges but possible in early spring before new growth
-
Used for topworking an established tree
Additional Tips:
-
Use healthy, virus-free budwood (scion material)
-
Choose a compatible and disease-resistant rootstock (e.g., Carrizo or Swingle citrumelo)
-
Ensure good contact between cambium layers (essential for successful union)
-
Protect grafts from sun and dehydration
Certainly! Here's a step-by-step guide on how to perform T-budding on citrus trees, particularly orange trees, along with visual aids and recommended tools.
Step-by-Step Guide to T-Budding Citrus Trees
1. Select Healthy Rootstock and Budwood
< data-end="385" >Rootstock: Choose a vigorous rootstock with a stem diameter similar to a pencil.
Budwood: Select a healthy bud from the desired citrus variety. Ensure the budwood is disease-free and has mature buds.
2. Ensure the Bark is Slipping
< data-end="675" >The bark should separate easily from the wood, indicating active growth. This typically occurs in late spring to early summer.
3. Make the T-Cut on the Rootstock
< data-end="763" >Vertical Cut: About 1 inch (2.5 cm) long.
Horizontal Cut: About 1/3 the circumference of the stem, intersecting the top of the vertical cut to form a "T".
Gently lift the bark flaps with the knife tip.
4. Prepare the Bud (Shield)
< data-end="1065" >Cut a bud from the budwood with a thin slice of wood attached, approximately 1 inch (2.5 cm) long.
Handle the bud by the petiole (leaf stem) to avoid touching the cut surface.
5. Insert the Bud into the T-Cut
< data-end="1244" >Slide the bud shield under the bark flaps of the rootstock.
Ensure the bud is fully inserted and aligned with the T-cut.
6. Wrap the Graft
< data-end="1415" >Use budding tape or a rubber band to wrap the graft site, leaving the bud exposed.
The wrap should be snug but not too tight to avoid damaging the bud.
7. Monitor and Aftercare
< data-end="1601" >After 2-3 weeks, check for bud take. A successful graft will show signs of growth.
Once the bud has taken, cut back the rootstock above the graft to encourage the bud to grow.
? Recommended Tools for T-Budding
To perform T-budding effectively, consider using the following tools:
< data-end="1935" >?Grafting Knife P11: A specialized knife designed for precision cuts required in grafting.
?Fujiwara Garden Grafting Knife: A durable and sharp knife suitable for various grafting techniques.
?Old Bear Grafting Knife 937719LN: A traditional grafting knife with a comfortable grip and sharp blade.
?FUJIWARA Garden Grafting Tool: A versatile tool that can assist in making precise cuts for budding and grafting.
?Citrus Twist Knife: While primarily used for garnishing, it can be handy for making delicate cuts in grafting.
Visual Guide
For a visual demonstration of T-budding on citrus trees, you can watch the following video:
This video provides a practical walkthrough of the T-budding process, which can enhance your understanding and technique.


