


by Jason D. LittleI don’t recall ever meeting anyone who claimed to not be fascinated to some degree by the night sky. There’s just something hypnotic about gazing upon objects that are billions of years old and light years away, yet so many people feel a rather close affinity with these distant bodies. While the physical gulf between us and the stars is, in any currently feasible mode of manned travel, insurmountable, we’re generally content to simply stand out in the darkness and scan the skies unassisted by anything fancier than a basic telescope. Other than that, we have historically relied on all the breathtaking photos of space provided to us by the experts.
零七八碎
故乡在哪里
正文
But we no longer have to leave all the fun to full-time astronomers; given the wide accessibility to and technological sophistication of digital cameras, anyone can photograph the universe. And one of the easiest astrophotography subjects to capture is also one of the most impressive: the Milky Way Galaxy. Let's look at exactly how to photograph the milky way for stunning results.
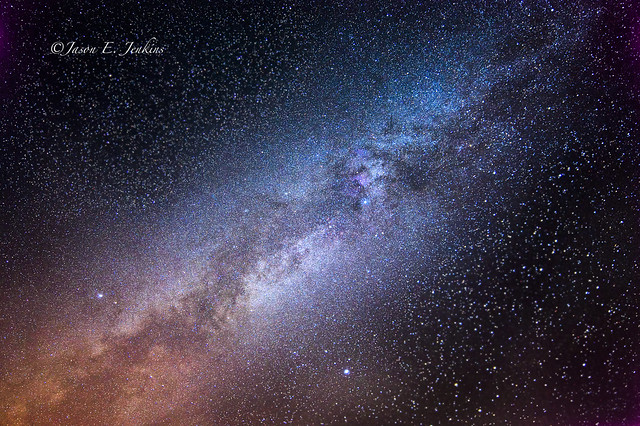
Photo by j-dub1980(THANK YOU FOR 100k+ Views), on Flickr
Obviously we can’t photograph the whole galaxy since we live inside of it; that famous white streak that dominates so much of the night sky is actually the light of billions of stars whose light, from our point of view on earth, seems to blend together, sporadically obscured by dust and gas clouds. In reality, all we are seeing is a small, edge-on view of the galaxy’s plane. Small, but impressive.

Photo by Josh Hawley, on Flickr
Here’s how you can capture a bit of the Milky Way for yourself.
1. Find a Dark Sky
Just waiting until nighttime won’t do. A dark sky free of light pollution is the first and most important requirement to even seeing the Milky Way, let alone photographing it. Be prepared to travel a considerable distance, otherwise you run the risk of city lights making their mark in your shots. The moon can have a similar impact on your Milky Way photos; shooting during a full moon will wash out your images. Try to shoot during a new moon.
2. Know When and Where to Look
The part of the Milky Way that is most easily visible to the naked eye isn’t visible all year round, especially for those in the Northern Hemisphere where February through September are the optimal times. You will find your celestial subject in the southern half of the sky, rising from the west. Residents in the Southern Hemisphere may have a slight advantage in this regard, as the central parts of the Milky Way can be seen overhead.
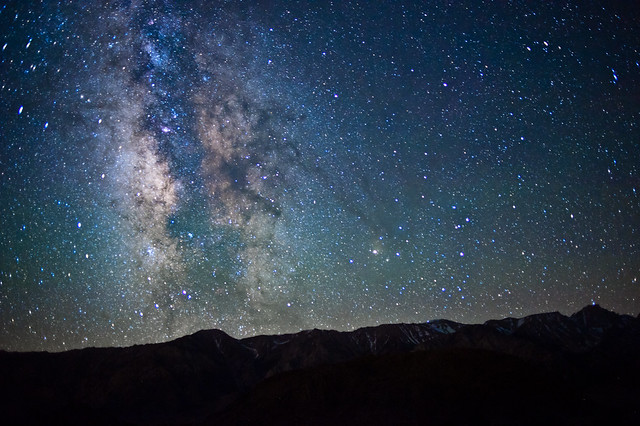
Photo by John Lemieux, on Flickr
3. Use a Digital Camera with Good High ISO Capabilities
You’ll be shooting at night with very little available light; you want your camera’s sensor to be able to handle the shooting conditions without introducing an excessive amount of noise. A full-frame camera is preferable but certainly not a necessity.
4. Use a Fast Wide Angle Lens
You should work with a lens with a maximum aperture of at least f/2.8; the faster the better. It’s not that you’re totally out of luck if your fastest lens is f/3.5 or so, but you’ll have more of a challenge on your hands since the lens won’t be able to gather as much light. The same principle applies to focal length; go as wide as you can. You may be seeing only a fraction of the Milky Way, but it’s still monstrous in size. The wider your lens, the more of it you can capture.
5. Use a Tripod
This really isn’t optional. Bells and whistles are nice, but sturdiness is your number one concern.
6. Use Live View
To avoid the headache of trying to focus in the dark, use your camera’s live view feature to manually focus on a bright star. Alternatively, you could use the distance markings on your lens (if it has them) to set hyperfocal distance.
7. Start with ISO 3200
Referring back to the first point, a high ISO is essential to collecting enough light to render a bright image of the Milky Way. Under typical conditions, ISO 3200 is a good starting place. Based on how well this plays with other camera settings, you can go higher or lower from there.
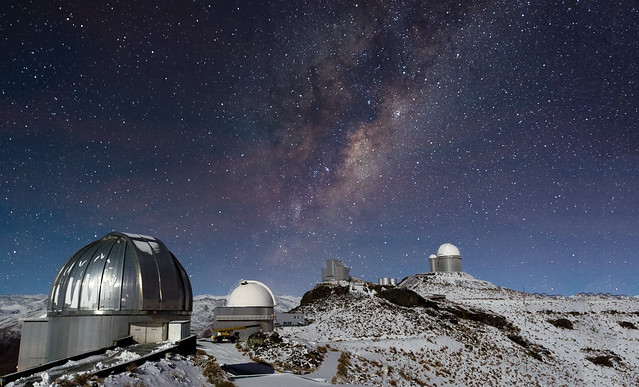
Photo by European Southern Observatory, on Flickr
8. Set a Long Shutter Speed
This is how you will capture more light and create a sufficiently bright exposure. There just one problem, though. The planet doesn’t care if you’re new at astrophotography; it’s going to keep on rotating, which means if you leave the shutter open for too long, you’ll end up with star trails. There’s nothing wrong with star trails when that’s what you’re aiming for, but they aren’t really desirable for photographing the Milky Way. To get pinpoint stars, use the “500 rule,” which calls for you to divide 500 by the focal length of the lens you’re using. So, if you have a 24mm lens on a full-frame camera, you will set your shutter speed to 20 sec. (500/24 = 20.83). If you’re working with a crop sensor camera be sure to account for the crop factor (typically 1.5 for Nikon and Sony, 1.6 for Canon). As an example, using the same 24mm lens on a Nikon crop, you’d end up with an effective focal length of 36mm (24×1.5 = 36). Applying the 500 rule will yield a shutter speed of 13 sec. (500/36 = 13.89). There are those who debate about whether to use the 500 rule or the similar 600 rule; without delving further into the mathematics of it all, it really is more a matter of visual perception. In short, stick with the 500 rule, especially if you intend to make poster size prints. If, after you’ve gotten more comfortable and done some experimenting, you find the “600 rule” works better for you (should be find for web images) then definitely go with that.
9. Set a Wide Open Aperture
Remember, it’s all about collecting as much light as possible; depth of field isn’t the primary concern here. In case of any significant softness you’ll want to stop your lens down. This is why it’s so important to use a fast lens in the first place; if you know your lens is unacceptably soft at f/1.4, stopping down to f/2 will sharpen things up without having a severe impact on the lens’ light gathering ability.
10. Compose your shot. There’s no right way or wrong way to compose your shot, but you can create a sense of depth by framing this as a standard landscape shot with the Milky Way serving as the background. Just because it’s dark out doesn’t mean you should forget about the foreground, though; you can add interest to your scene by including hills or mountains, trees, rock formations, or even a person. Experiment all you want.
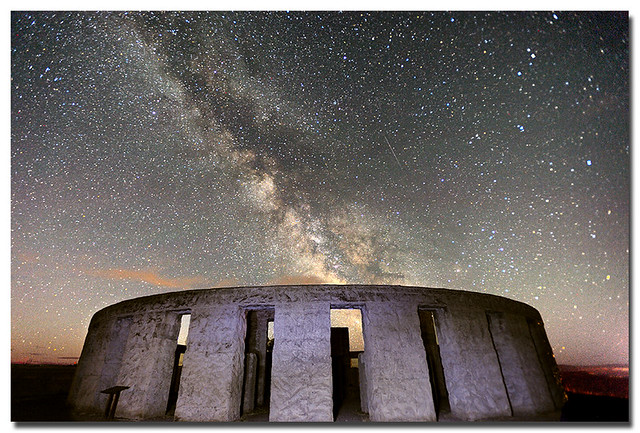
Photo by .Bala, on Flickr
11. Get a Satisfactory Exposure
It’s very likely that your first shot won’t be an exposure you’re satisfied with (if you’re not happy with the focus or composition, adjust those things before moving on to worrying about exposure). If the exposure isn’t “right,” you’ll have to identify the problem and work from there. If there’s too much noise, simply decrease the ISO. If the shot is overexposed, check your surroundings for light pollution; decrease shutter speed; stop down the lens; or decrease ISO. If it’s underexposed, make sure you’re using the widest aperture on your lens; increase shutter speed (but beware of star trails forming); increase ISO.
12. Process it
There will be a lot of variation at this final stage and, again, there is no one right way to handle the post processing of your shots. The two most important things you can do to make post processing a little easier is to shoot raw and get the best exposure you can in-camera. You may need to apply some sharpness and noise reduction. According to some sources, the color temperature of the Milky Way is around 4840°K; if you find it too much on the yellow/orange side, adjust white balance until you have a neutral scene. You will definitely need to increase contrast; it’s okay to be a bit heavy handed here, so long as you’re not losing shadow detail. If the photo editing software you are using allows curves adjustments, make use of it, as you can be more precise with your work. Assuming you got a good in-camera exposure you shouldn’t have to play with the exposure slider too much
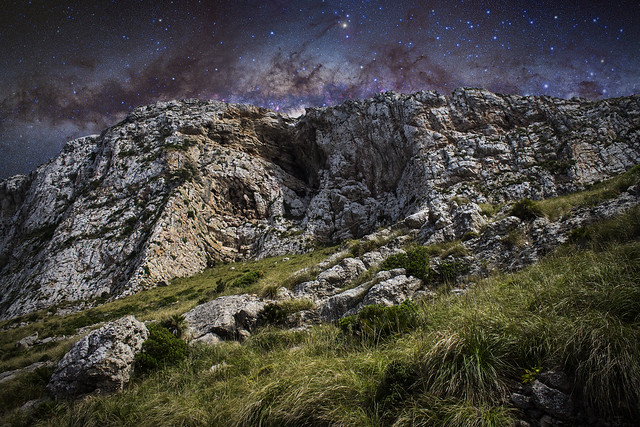
Photo by Damian Witkowski, on Flickr

As you can see, you don’t need a whole lot of specialized equipment in order to be successful in astrophotography. In addition to having a passion for the subject, you’ll certainly have to invest a lot of planning, practice, and patience. The pay-off, however, will be worth all the time and effort you expend.

评论
目前还没有任何评论
登录后才可评论.