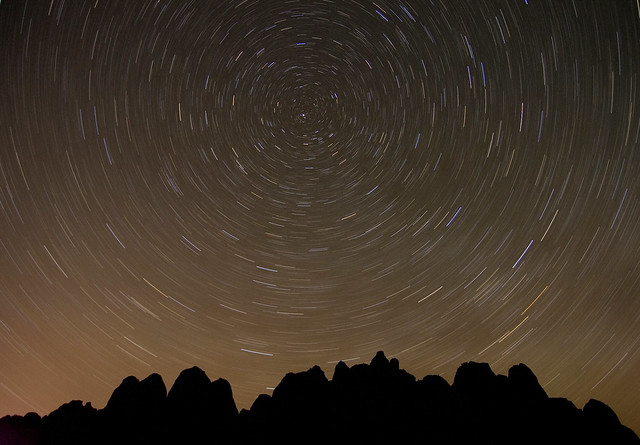
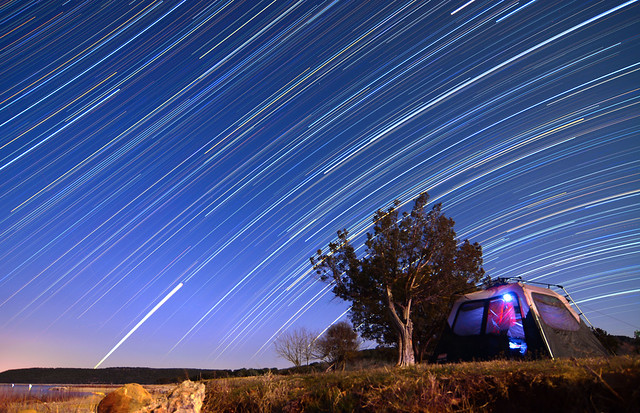
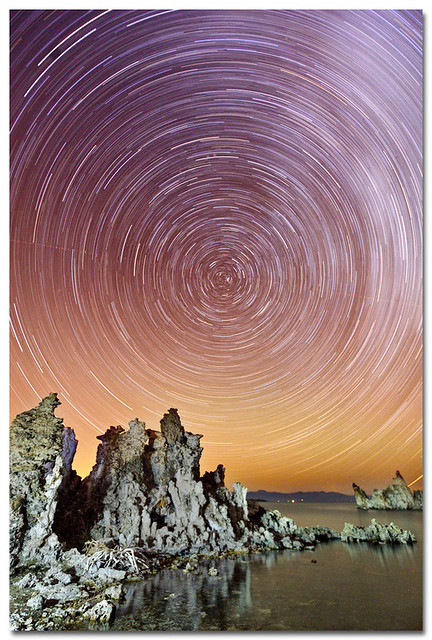
How to Photograph Star Trails: The Ultimate GuidePhotographing the night sky can be a surreal experience, and star trail photography is highly rewarding if you have a bit of patience. Those 2 hour long single exposures can turn an otherwise mundane day shot into an otherworldly image. When photographing star trails, your goal is to allow your camera to pick up light it wouldn’t normally by using extra long exposures. Working under the night sky means that the amount of available light is severely limited – most likely, you’ll only be able to capture the stars in the sky depending on if there are other light sources around, unless you're planning on spending a few hours for each exposure. With that being said, it’s very important to utilize proper long exposure techniques: locking your mirror, mounting your camera on a secure tripod, and using a remote cable release for your shutter. However, there are additional things to consider when photographing star trails that will set your night images apart from the crowd – how do you get those fantastic lines of light? There are two methods popular with star photographers – using one very long exposure (long enough to register some noticeable star movement; at least 30 minutes) OR taking many shorter exposures and stacking those images in a way that shows sequential movement. One Long ExposureTo capture star trails using one long exposure, there are a couple important things to consider. You need to let as much light into your lens as possible for those stars to register (the why's of this are explained below) – this means using a fast lens, preferably in the f/2.8 range. When photographing stars under one exposure, you need to do it during a new moon night – meaning that the moon is nowhere to be seen. If you have anything more than a crescent, your exposure will be limited to the 10-minute range because of the ambient light, which won’t do much for star trails. For this kind of photography, darkness is your best friend. Ultimately, you’re aiming for your environment to be illuminated by the stars themselves – yes it’s possible! However, this entirely depends on the length of your exposure. The image below is the result of an 80 minute exposure taken under a new moon – you can see that the foreground is exposed nicely and the star trails are outstanding. When calculating your exposure, it would be best to do a shortened test shot so you’re not waiting a ridiculous amount of time just to see if your settings are correct. Many night photographers will jack up their ISO as far as it’ll go and shoot wide open – you’ll rarely find an instance where you’ll be taking a photo shorter than 30 seconds here. Of course the test shot will be entirely unusable due to noise and lack of trails, but it will give you a base to calculate what settings are needed with an ISO of 100. Image Stacking Shorter ExposuresAn alternative to waiting an hour or more for your exposure to finish is to take sequential images and stack them together in post process to get your star trails. In short, your exposure should be just long enough to register your stars as bright objects in the sky before moving onto the next one. It’s not uncommon to have several hundred images to stack taken over the course of a few hours. Post process software such as ImageStacker and DeepSkyStacker will automatically throw all your images together and produce a stunning star trail. Another benefit to image stacking is that you have all the necessary photos to make a time lapse video – here's a short clip of what you can accomplish with this method of star trail photography: both the time lapse video and the composite trail image are shown here. Tip: Between shots, try waiting a few seconds to let your sensor cool down a bit as a hot sensor = more digital noise. Aperture: Wide Open or Narrow?A common question – or rather misconception – with star trail photography is why wouldn’t you use a small aperture (say f/8 or above) for a sharper image rather than shoot wide open? You’re already shooting hour-long exposures so the timing isn’t a concern….surely it’s better to have a sharper photo, especially if you have other focal points (foreground interest, etc). The issue with photographing stars is that they move – this is why we want to photograph their trails in the first place. With that in mind, there is a delicate balance to find with your exposure that’s more than just how long your shutter is open. Wider apertures allow for shorter exposure times because they let more light in than narrow apertures. Focus on that last part – they let more light in. Considering that stars are constantly moving, you need to make sure that they’re registered on your sensor before they move – otherwise your star trails will be very dim, perhaps even non-existent depending on your chosen f/stop. Imagine doing a two-hour shoot where your foreground is lit nicely, but your star trails look no more than a slight variation in tones on the night sky. Considering this, it’s a good idea to have a lens that’s capable of very wide apertures – such as f/2.8 or even wider. The wider your aperture, the brighter your star trails will be. Finding the PolesAs you may have noticed, several of the example images used here have a circular pattern around a more central location- also known as the north and south poles. This is especially apparent in the video link above. In order to replicate this, you need to locate the poles first and aim your camera for it. If you're an astronomy beginner like me, this may seem a bit daunting – not to worry though. If you're shooting towards the north pole, the Polaris (a.k.a. the North Star) is what you're aiming for – it's the last star on the handle of the Big Dipper, so if you locate that you're good to go. The south pole is a bit more difficult to eyeball as there's no prominent bright star near the pole to help like the Polaris. You can still gather an idea of where it is though by using this free software to help pinpoint the south and north poles – very handy. More TipsLight Pollution – Whether from a nearby city or the street lamp at the end of your driveway, light pollution can greatly affect long exposures. This isn't necessarily a bad thing though – in fact, it may add to the ambiance of your photo, such as a star trail image that begins during the blue hours. Experimenting with atmospheric light can be a creative way to make a unique star trail image – just be aware that the lighter your sky is, the less contrast your star trails will have. Clear Skies and Dry Air – Obviously you don't want to photograph star trails under a cloudy sky, but other atmospheric filters can interfere with your night photography – air pollution and humidity being the top annoyances. The best locations for a clear sky would be high up and away from any congested cities, and take on a night with very low humidity. |